Managing Gift Cards with Bulk Actions
Overview
The Bulk Actions feature allows you to create, send, update, or import a large number of gift cards at once by uploading a single file. This saves you significant time compared to managing gift cards one by one. This guide will walk you through how to use the bulk tools to manage your gift cards efficiently.
Accessing the Bulk Actions Page
- From your main dashboard, navigate to the Gift Cards section.
- Click on the Bulk Actions tab or menu item.
You will see a page with several tabs: Generate, Send, Update, Import, and Results. Each tab corresponds to a specific bulk action you can perform.
Preparing Your Data File
All bulk operations are performed by uploading a CSV (Comma-Separated Values) file. You can create a CSV file using any spreadsheet software like Microsoft Excel or Google Sheets.
- The first row of your CSV file must be a header row that contains the exact field names (e.g., code, initial_value, email).
- Each subsequent row represents one gift card to be processed.
- We recommend downloading our template file to ensure your data is formatted correctly.
- [Link: Download CSV template for Bulk Actions]
- Tip: Before uploading a large file, try a small test file with just 2-3 rows to ensure everything is working as expected.
1. Generating Bulk Gift Cards
Use this feature when you want to create a batch of new gift cards but not send them to anyone yet. They will be available in your system to be used or sent later.
How to Generate Gift Cards:
- Navigate to the Generate tab.
- Fill in the Gift card details form:
- Value: Enter the monetary value for each gift card (e.g., 25.00).
- Number of gift cards: Specify how many cards you want to create with these settings.
- Prefix (Optional): Enter up to 4 characters to add to the beginning of each generated gift card code. This can help you identify a specific batch of cards later.
- Code length: Choose the length of the unique gift card code that will be generated (between 8 and 16 characters).
- Note (Optional): Add an internal note for this batch of cards. This note is not visible to customers.
- Expiration date:
- Select No expiration date if you don't want the cards to expire.
- Select Set expiration date to choose a specific date when the cards will become invalid.
- Click the Start generation button.
The system will then create the specified number of gift cards with these settings. You can view the results and download csv file with results of this job on the Results tab .
Special Option: Generate without import
- Check the Generate without import box if you plan to use these gift card codes for physical, printed cards. When this option is selected, the codes are generated but are not activated in the system immediately.
2. Sending Bulk Gift Cards
Use this feature to create and immediately email gift cards to a list of recipients. This is perfect for marketing campaigns, corporate gifting, or customer rewards.
Required & Optional Fields:
| Field Name |
Required |
Description |
| initial_value |
Yes |
The starting balance of the gift card. |
| email |
Yes |
The email address of the person receiving the gift card. |
| name |
No |
The recipient's name, which can be used in the email template. |
| message |
No |
A personal message to include in the gift card email. |
| expires_on |
No |
The date the gift card expires, in YYYY-MM-DD format. |
Note: If a recipient_email is provided, the system will automatically be set to notify the recipient. Similarly, if a customer_email is provided, the purchaser will be notified.
- Navigate to the Send tab.
- Prepare your CSV file with the required columns. Ensure all email addresses are correct.
- Upload your CSV file.
- Click the Start Sending button to begin the process.
3. Updating Bulk Gift Cards
Use this feature to make changes to existing gift cards in your system. You can change their balance, expiration date, add a note, or disable them.
Required & Optional Fields:
| Field Name |
Required |
Description |
| code |
Yes |
The unique gift card code you want to update. You must provide either the code or the internal card ID. |
| balance |
No |
Set a new balance for the gift card. Use + or - prefix to increment or decrement balance (e.g. +10 or -10) |
| expires_on |
No |
Change the expiration date. Use YYYY-MM-DD format. |
| note |
No |
Add or overwrite the internal note. |
| disabled |
No |
Set to TRUE to disable the card. Please note that this action cannot be reverted. |
| recipient_email |
No |
The email address of the person receiving the gift card. |
| customer_email |
No |
The purchaser's email. If provided, a confirmation can be sent to them. |
| notify_customer |
No |
Set true if you wan't to send notification to a customer |
| notify_recipient |
No |
Set true if you wan't to send notification to a recipient |
How to Update Gift Cards:
- Navigate to the Update tab.
- Prepare a CSV file containing the code of each gift card you wish to modify, along with the fields you want to update.
- Upload the file and click Start Update.
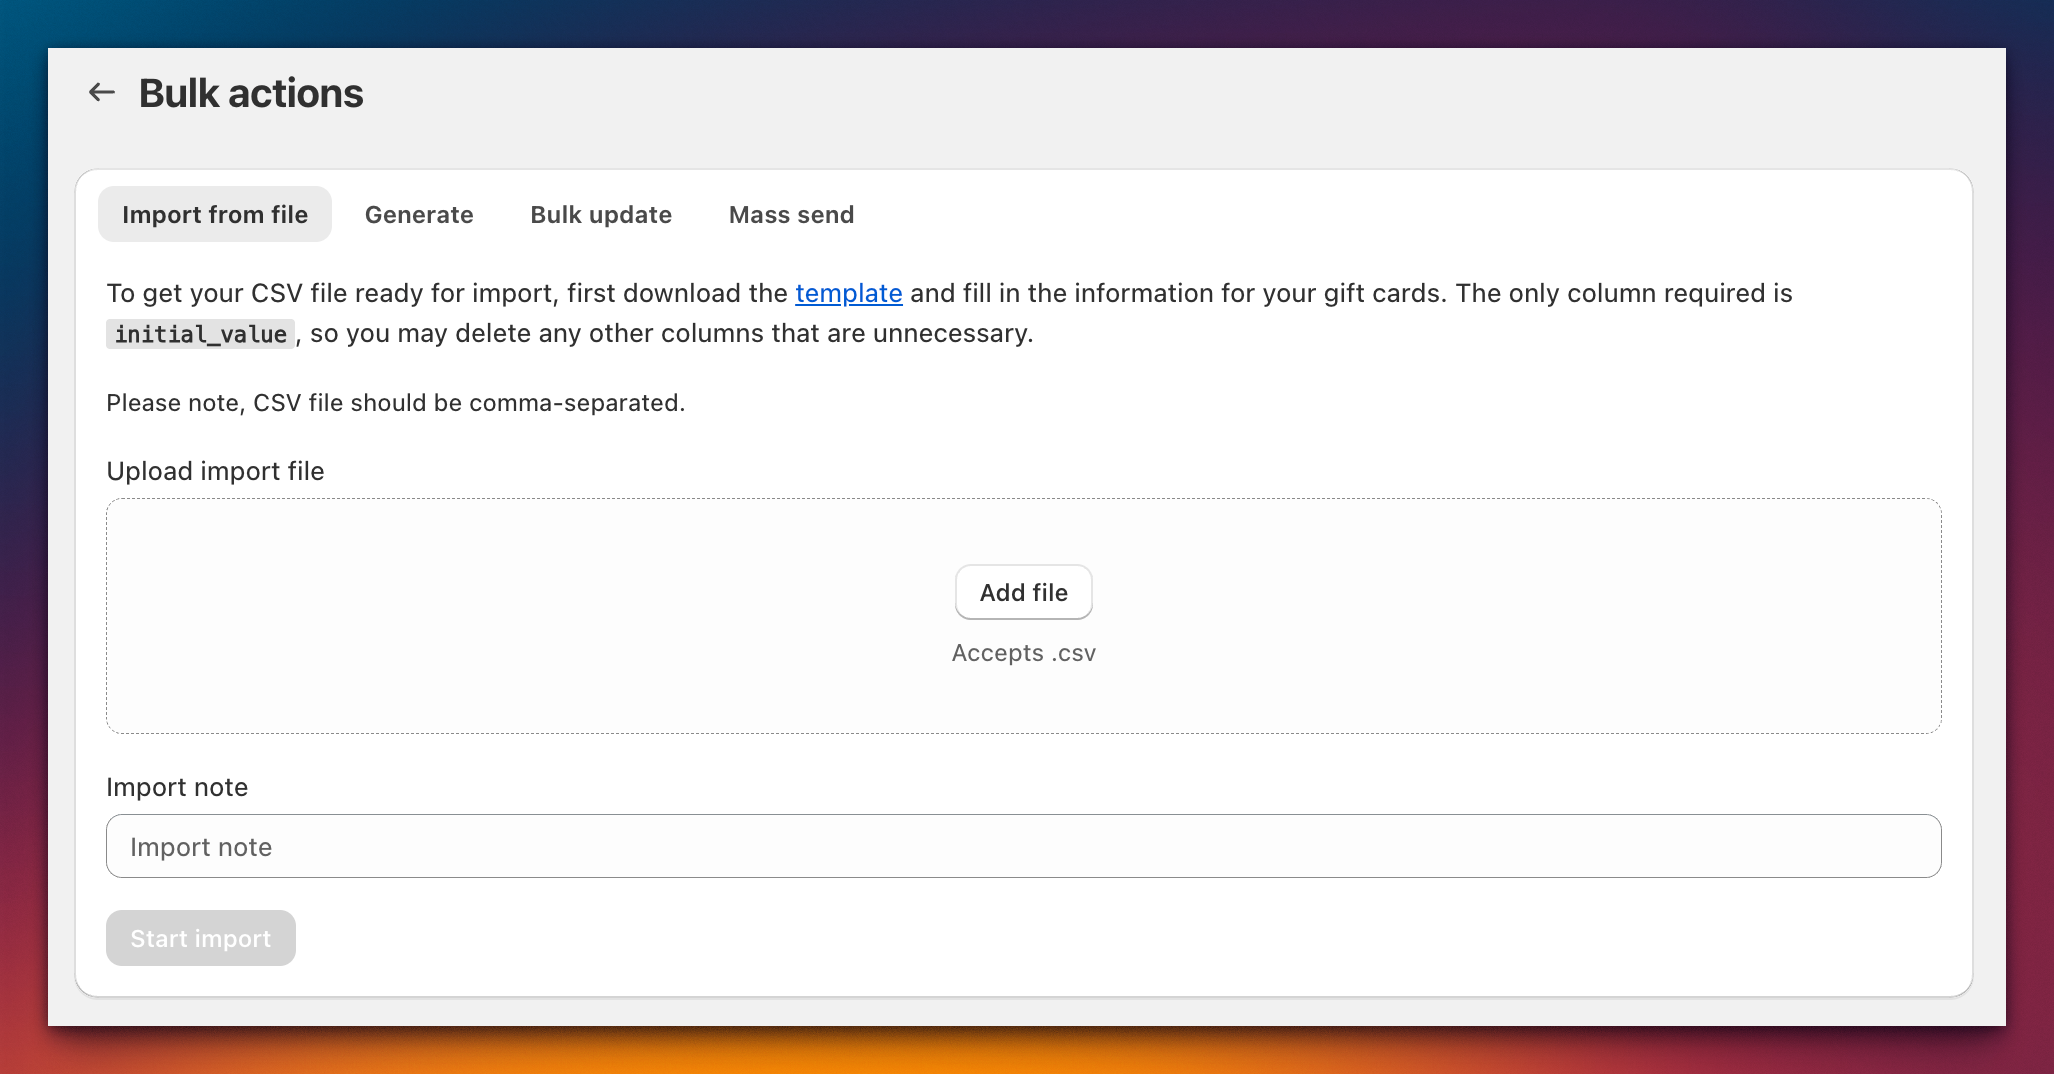
4. Importing Existing Gift Cards
Use this feature to migrate gift cards from another system into our platform. This allows customers to use their existing gift cards from your previous provider.
Required & Optional Fields:
| Field Name |
Required |
Description |
| initial_value |
Yes |
The current balance of the gift card at the time of import. |
| code |
No |
You can specify an existing code. If not set, the app will generate a gift code during the import. |
| customer_id |
No |
Associate the card with an existing Shopify customer. (Please note: notification will be sent to a customer. Please use recipient_email if you would like just to assign a customer) |
| expires_on |
No |
The expiration date of the imported card. |
| recipient_email |
No |
The email address of the person receiving the gift card. |
| customer_email |
No |
The purchaser's email. If provided, a confirmation can be sent to them. |
| notify_customer |
No |
Set true if you wan't to send notification to a customer |
| notify_recipient |
No |
Set true if you wan't to send notification to a recipient |
How to Import Gift Cards:
- Navigate to the Import tab.
- Prepare your CSV file with the required code and initial_value columns.
- Upload your file and click Start Import.
Monitoring Your Bulk Jobs
After starting a bulk action, you can monitor its progress on the Results tab. Your job will be processed in the background, so you can safely navigate away from the page.
- Processing: The job is currently active.
- Completed: The job finished successfully, and all rows in your file were processed.
- Completed with Errors: The job finished, but one or more rows in your file failed.
- Failed: The job could not be started or a fatal error occurred.
To see more details, click on a job in the list. This will show you which specific rows failed and provide an error message so you can correct your file and re-upload if necessary.
[Screenshot: The detail view for a job, highlighting a failed row and the corresponding error message like 'Invalid email address']
Common Errors & Troubleshooting
- Validation Error / Invalid Payload: This usually means your CSV file is empty, not formatted correctly, or the header row is missing. Please use our provided template.
- "Missing required field" Error: One or more rows in your file are missing a value in a required column (e.g., a missing initial_value when generating cards). Check the job results to see which rows were affected.
- "Rate Limit" Errors: Our system automatically manages requests to Shopify to prevent errors. If you see a note about rate limiting, it simply means the job may take a little longer to complete as the system safely paces the requests. No action is needed from you.
