Working with physical gift cards
Overview
This section provides guidance on how to effectively manage and utilize physical gift cards within your Shopify store. Physical gift cards are a popular option for customers, allowing them to purchase and redeem gift cards in-store or online.
Where to purchase physical gift cards
Physical gift cards can be purchased from the following link: Shopify Customizable Gift Cards.
This page offers a variety of customizable gift card options that can be tailored to fit your brand's aesthetic and customer preferences.
Using a Third-Party Printing Company for Gift Cards
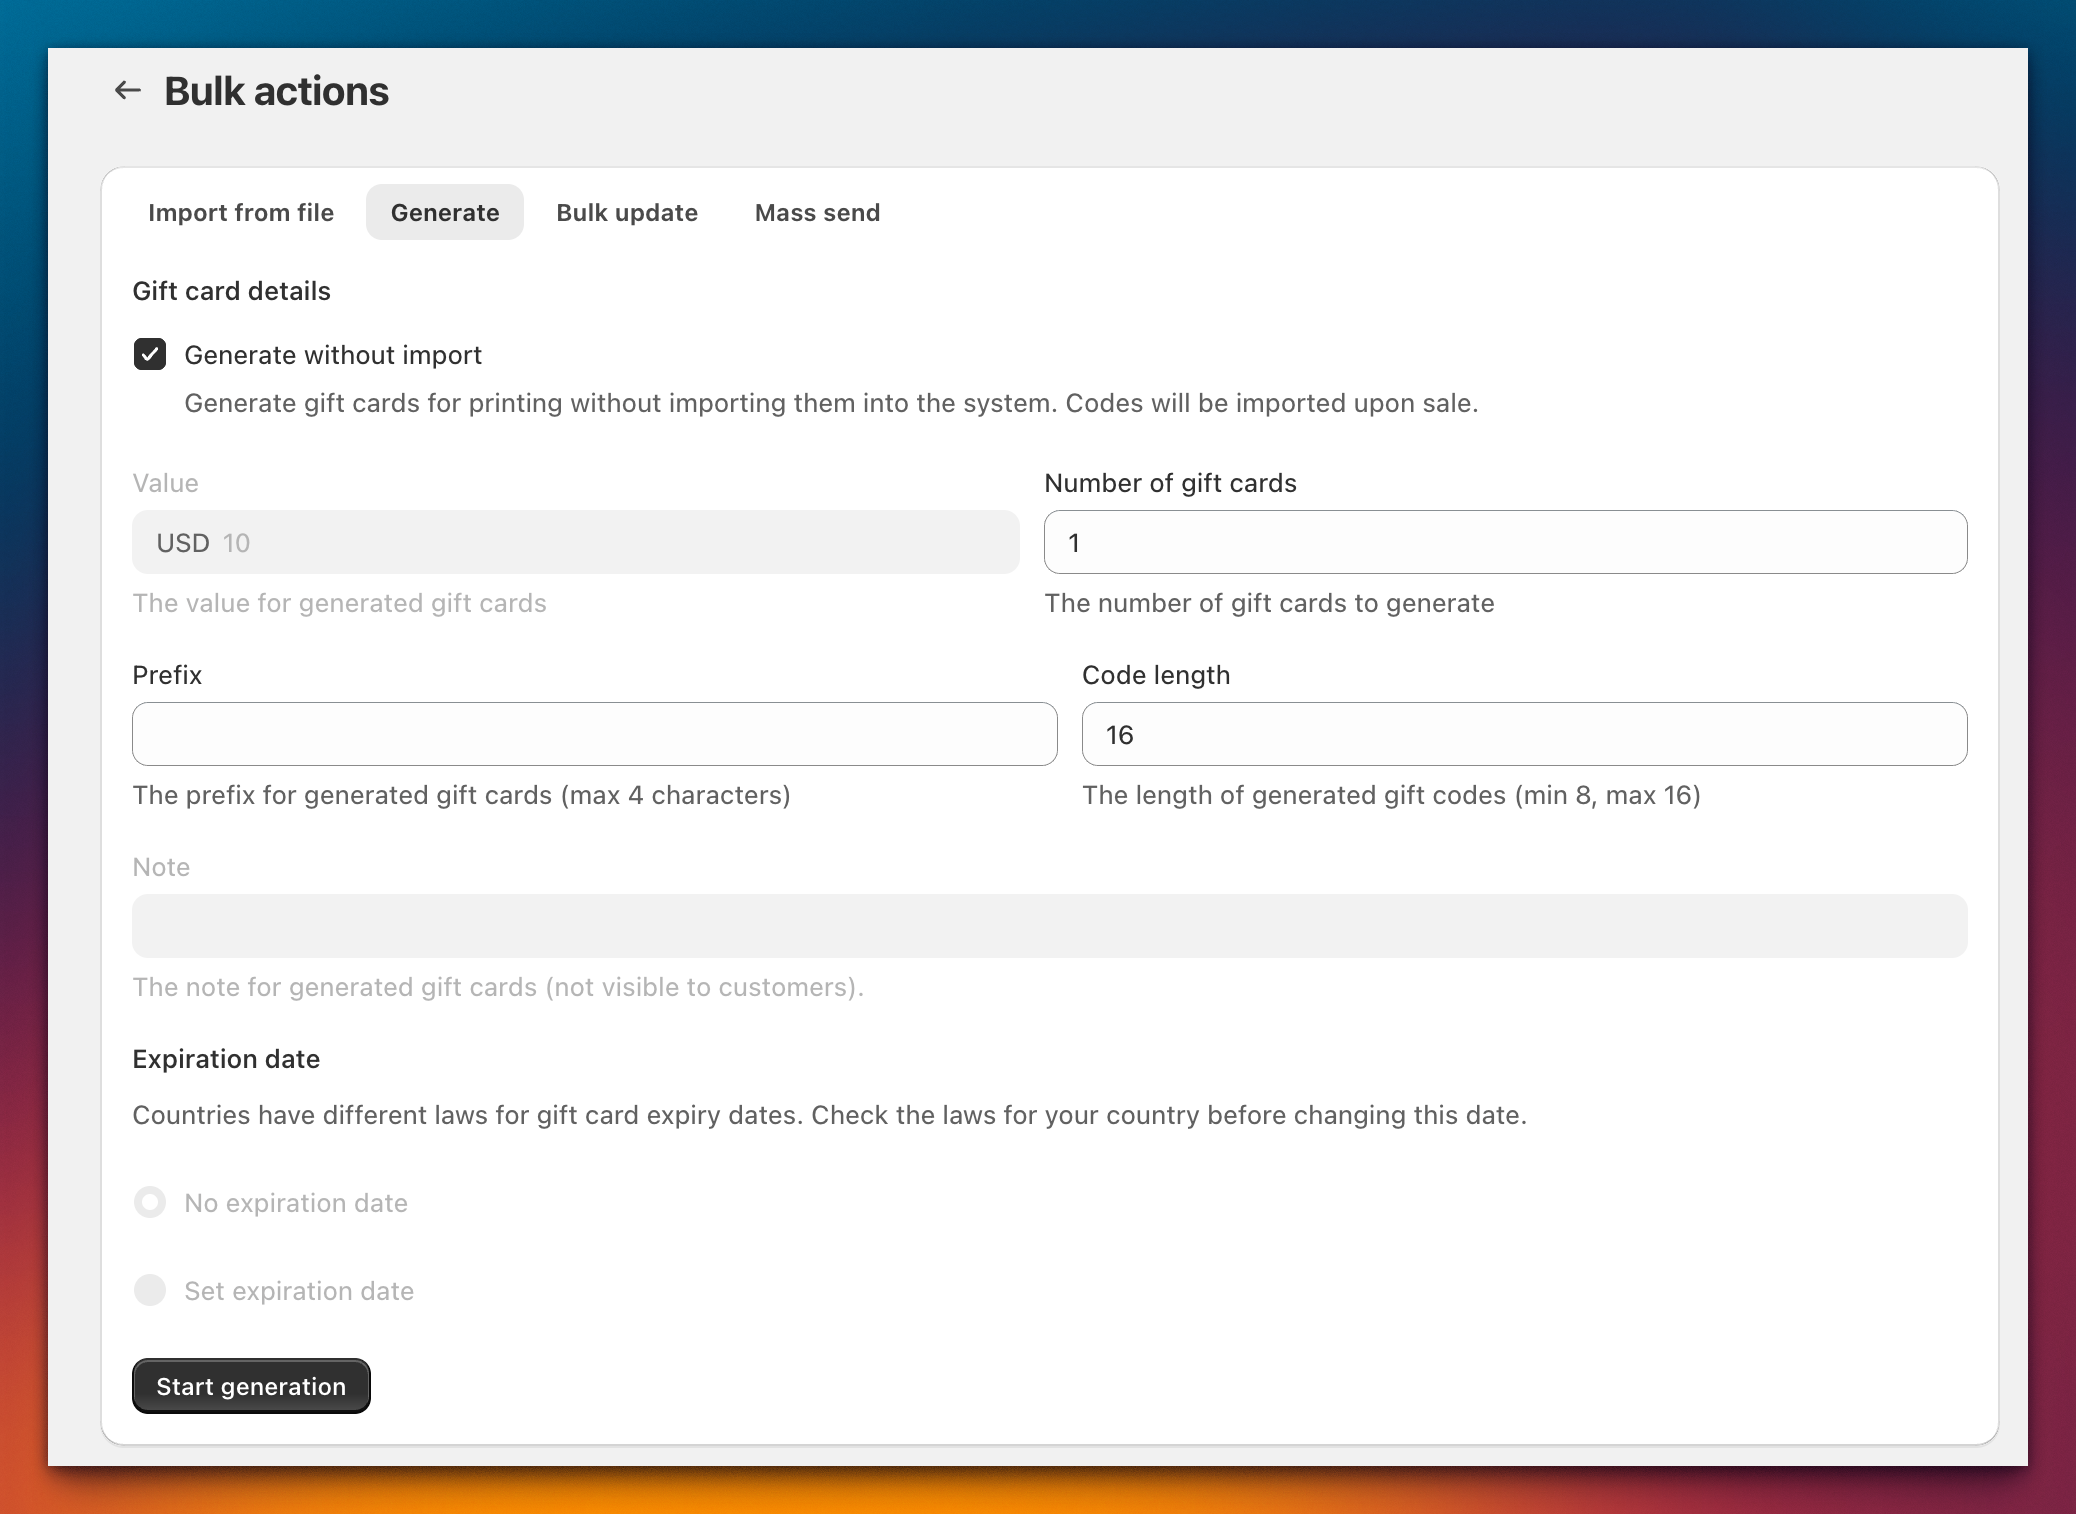
If you prefer to utilize a third-party printing company for your physical gift cards, you can generate gift card codes using our Gift Card Hero app. Follow the steps below to create and download the necessary gift card codes:
- Access the Gift Card Hero App:
- Log in to your Shopify admin panel.
- Navigate to Apps and select Gift Card Hero.
- Navigate to Bulk Tools:
- In the Gift Card Hero app, go to Bulk Tools.
- Generate Gift Card Codes:
- Select the option to Generate without import. This will create gift card codes that are inactive until they are sold.
- Set the number of gift cards:
- Specify the number of gift card codes you wish to generate.
- Click on Generate.
- Download the CSV File:
- After the generation process is complete, you will have the option to download a CSV file. This file will include:
- 16-character gift card codes.
- A string necessary for QR code compatibility with Shopify POS and our app.
- After the generation process is complete, you will have the option to download a CSV file. This file will include:
Important Notes
- The generated gift card codes will remain inactive until they are sold, ensuring that they cannot be redeemed prematurely.
- Provide the downloaded CSV file to your printing company to ensure they can print the gift cards accurately, including any QR codes required for scanning at the point of sale.
Registering Physical Gift Codes
Physical gift codes can be registered in two ways: Auto Assignment and Manual Assignment. Each method allows you to effectively manage the activation of your gift cards based on your store's needs.
1. Auto Assignment
Auto assignment allows for the automatic registration of gift codes as they are generated. This method streamlines the process, ensuring that gift codes are ready for use without requiring manual input.
For detailed instructions on how to set up and utilize auto assignment for gift codes, please refer to the following resource: Gift Codes Auto-Assignment.
Pros: Gift cards are assigned, and their balances are loaded automatically.
Cons: Gift cards are assigned one by one, requiring you to locate each printed gift card individually.
- Manual assignment
Manual assignment involves the individual registration of each gift code. This method provides greater control over which codes are activated and when. To manually assign gift codes, follow these steps:
- Access the Order:
- Navigate to Admin and select Orders.
- Locate and view the order that includes a physical gift card.
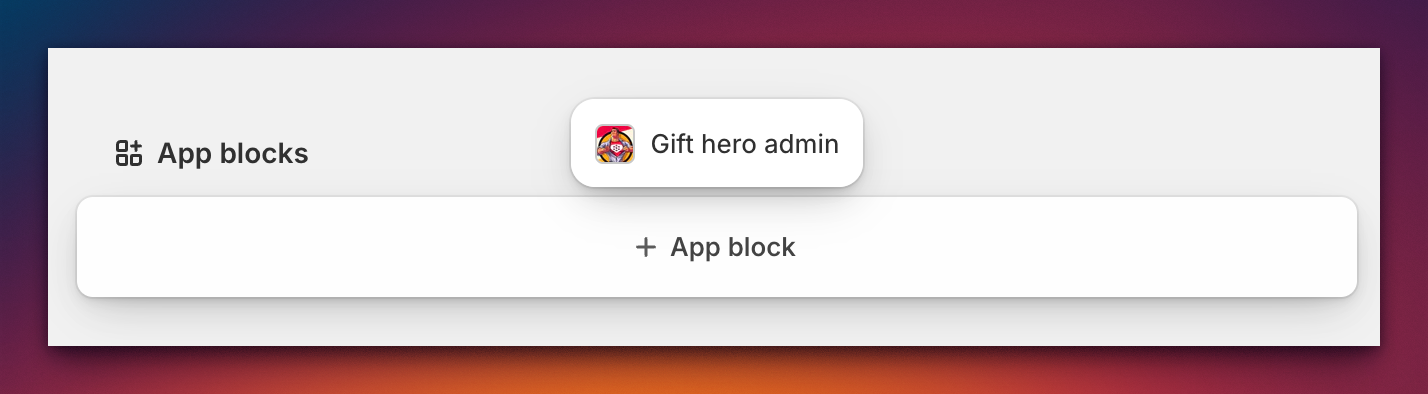
- Add the App Block:
- Scroll down to the App blocks section and click on + App block.
- Select Gift Card Hero Admin:
-
Choose Gift Card Hero Admin from the list of available app blocks.

- Pin the Extension:
-
Pin the Gift Card Hero Admin extension to make it easily accessible for future use.

-

Now, if you order contains physical gift cards you'll be able to assign them entering the gift code from printed gift card or scanning QR code.
Registering a gift card using a gift code
To register a gift card using a gift code, follow these steps:
- Enter the Gift Code:
- Input the gift code from the preprinted gift card. Ensure that the code has not been previously registered in the system.
- Register the Gift Card:
- Click the Register button to complete the registration process.
Scanning a QR Code to Register a Gift Card
To register a gift card using a QR code, follow these steps:
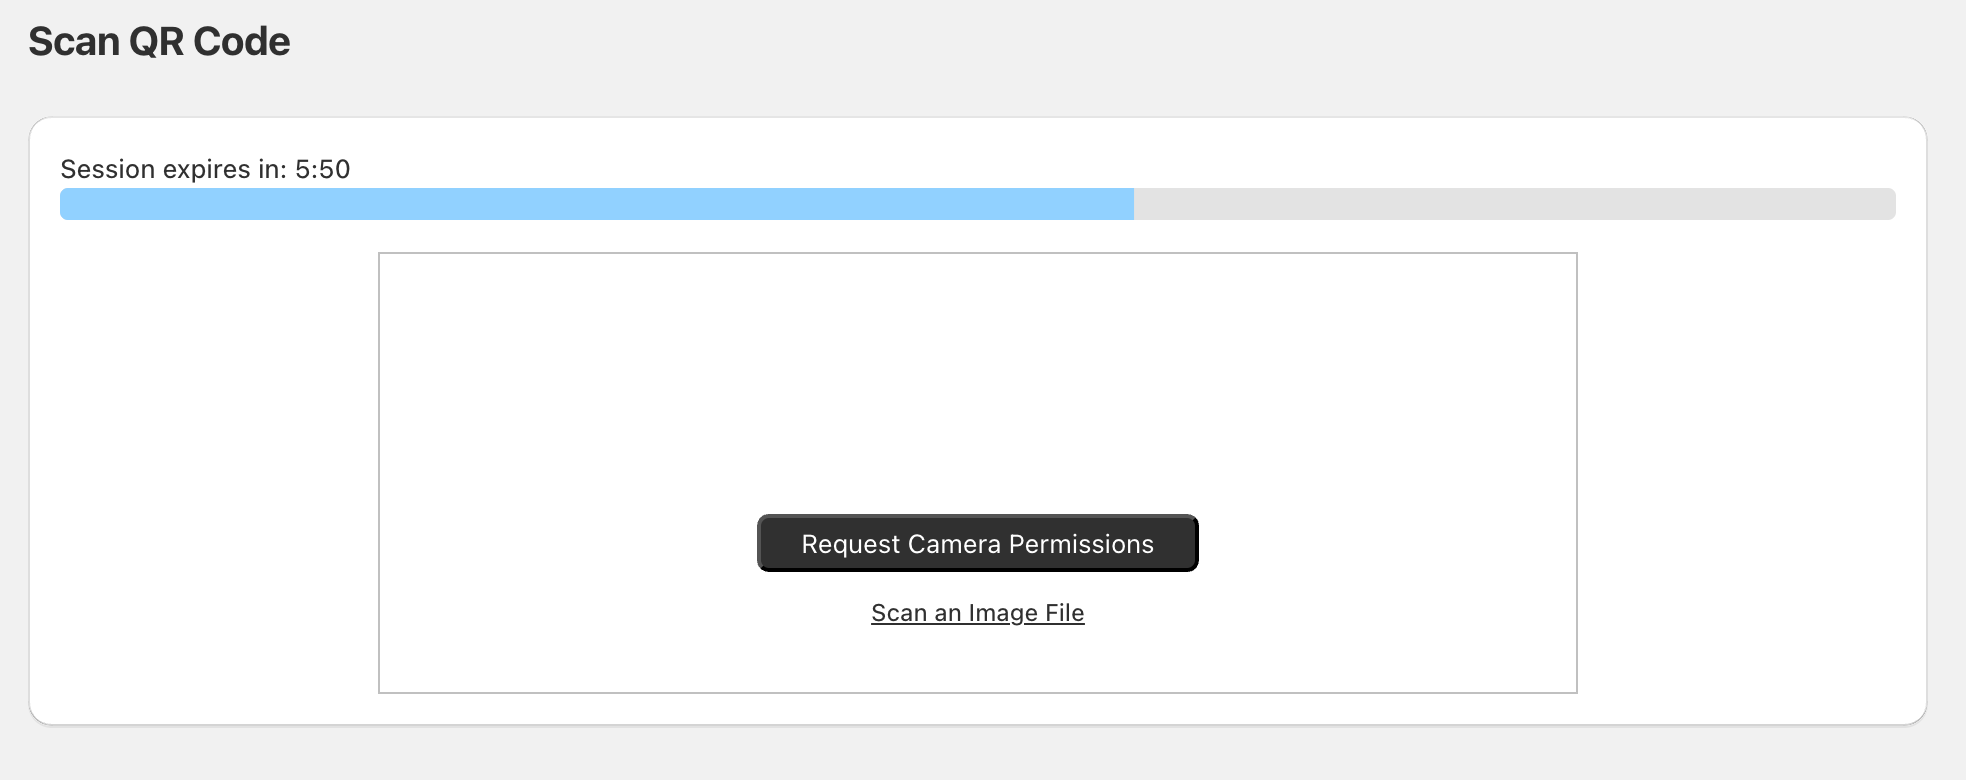
- Click the Scan QR Button:
- Click the Scan QR button. This action will open a new page.
- Active Session:
-
Your active session for registering a gift card will remain active for the next 10 minutes. A progress bar with a timer will be displayed at the top of the page to indicate the remaining time.
-
- Request Camera Permissions:
- Click the Request Camera Permissions button to allow the application to access your device's camera.
-
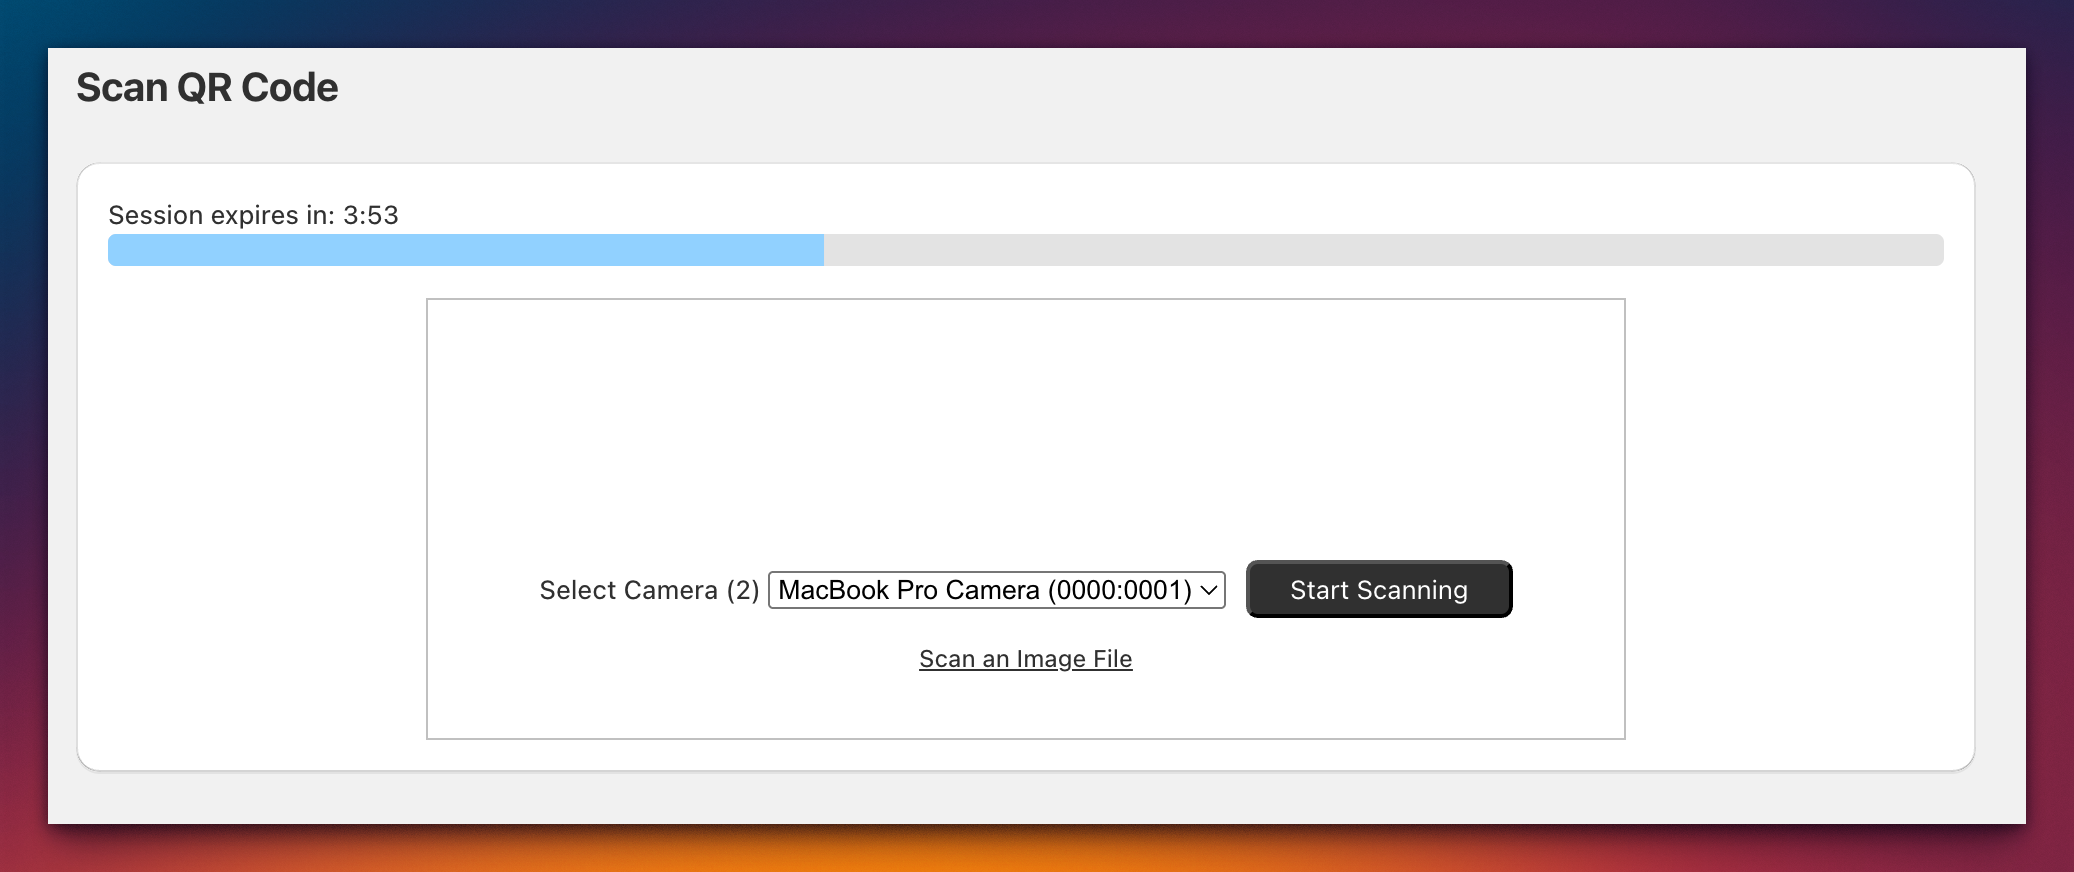
Click Allow while visiting the site

-
Press Start scanning button.
-
Your device camera will be activated
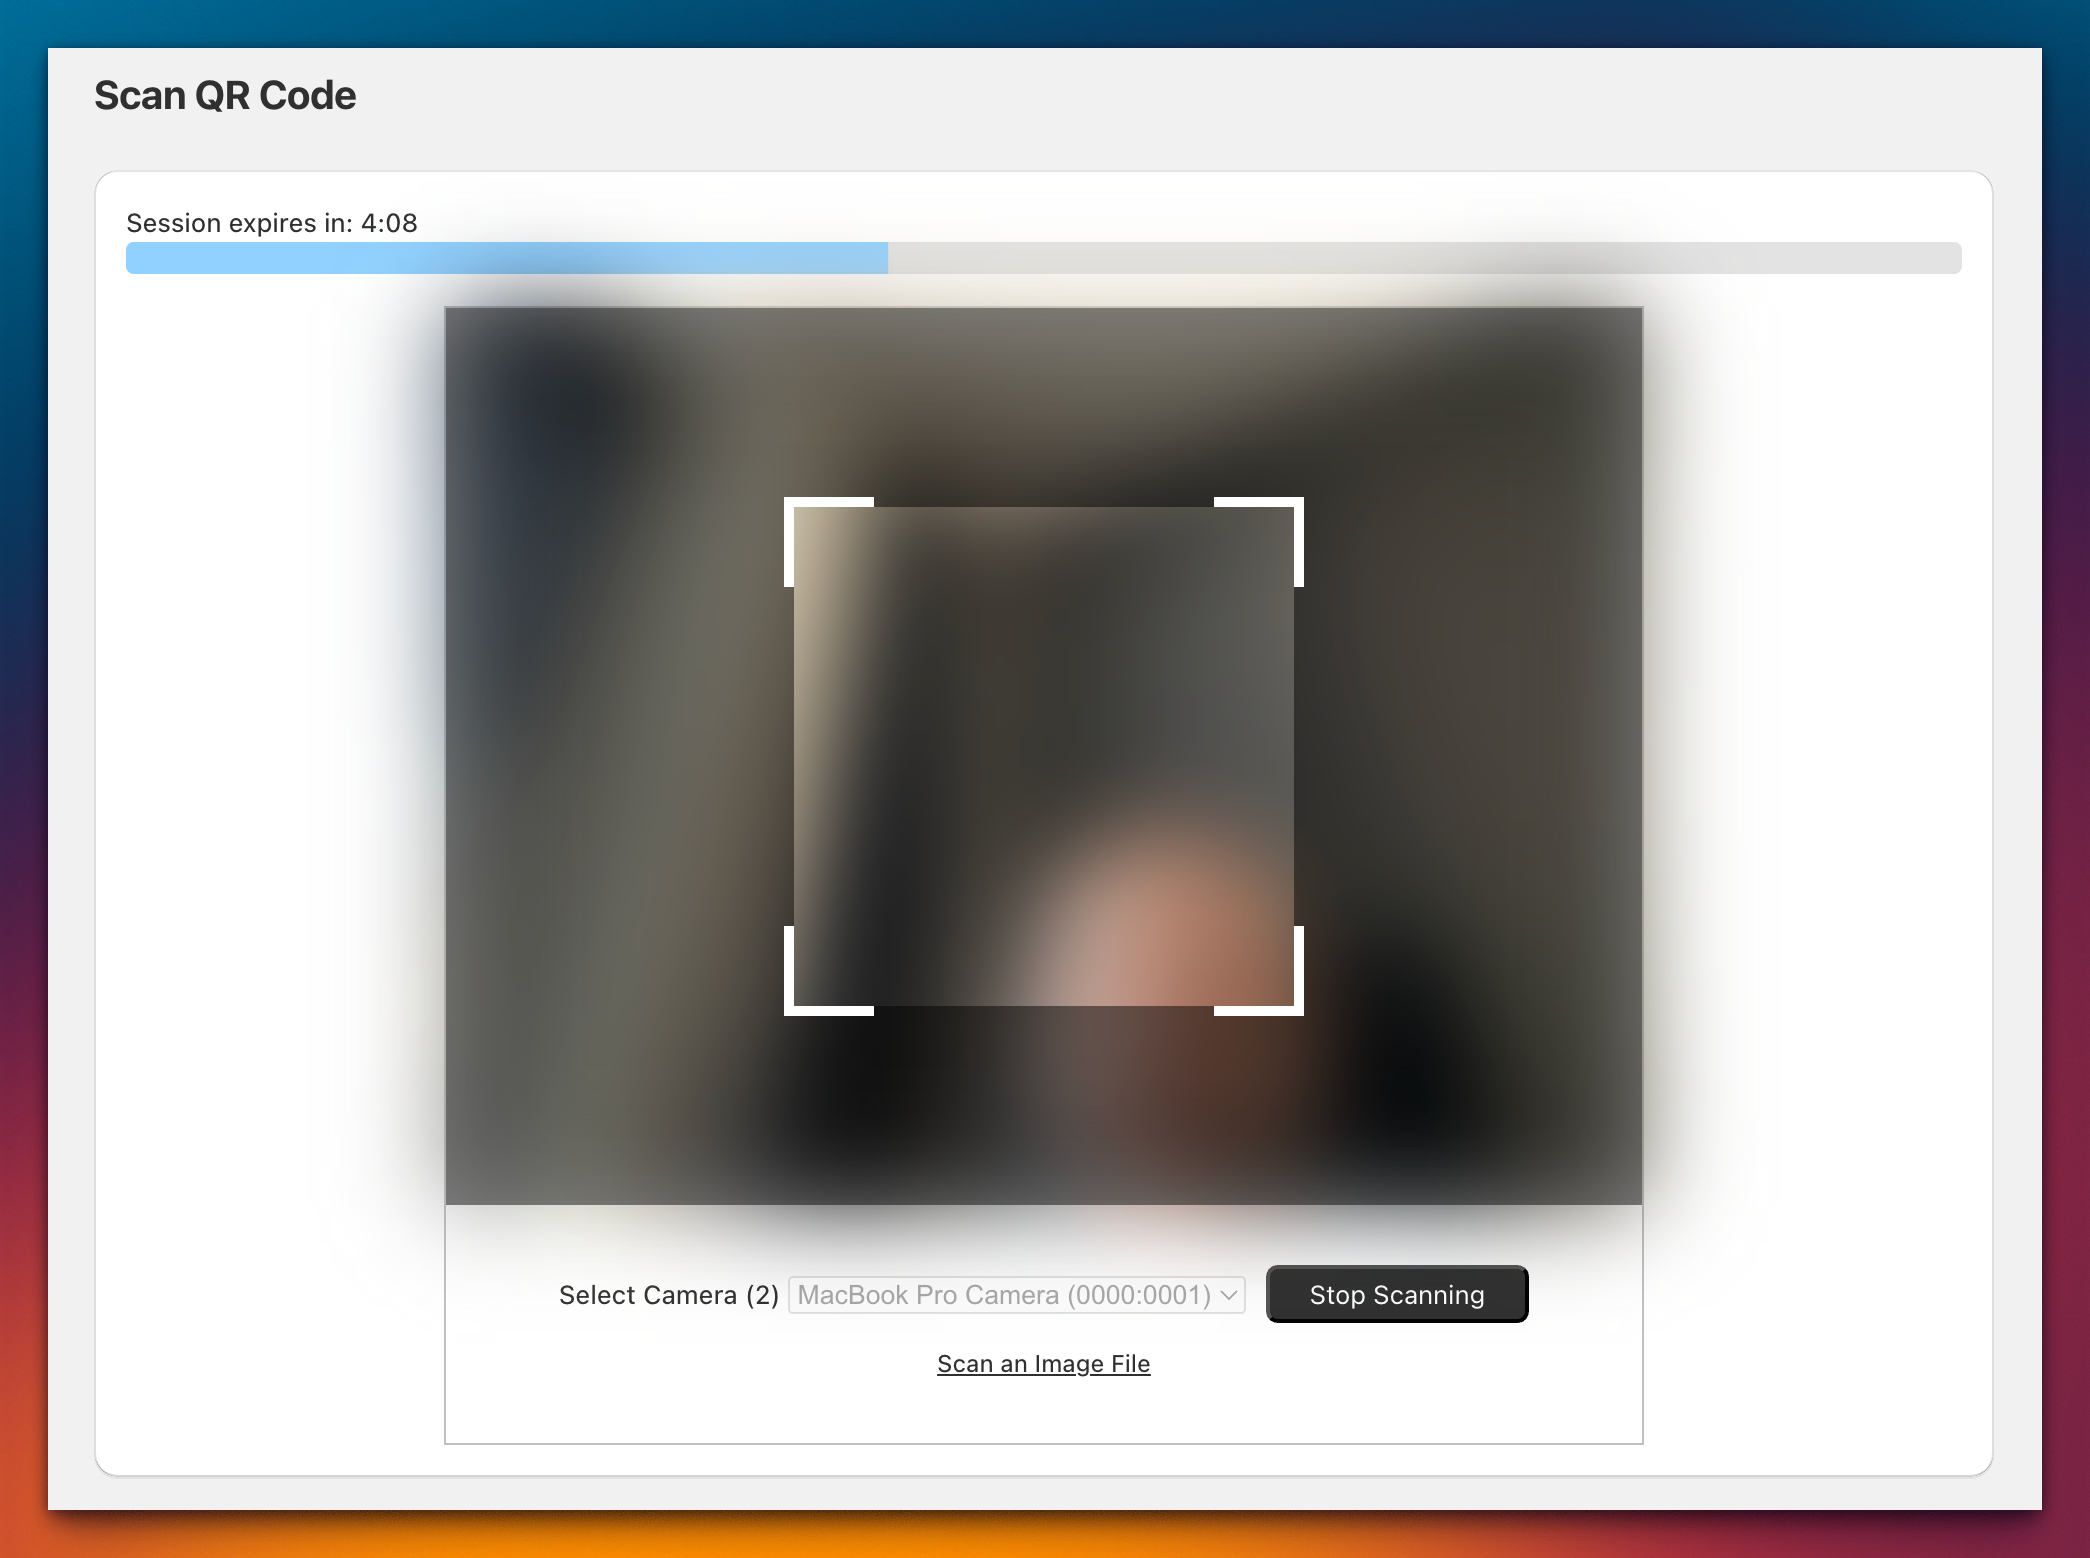
- Position the QR Code:
- Align the QR code in the center of the scanning rectangle on your screen.
- Successful Scan:
- After a successful scan, you will see a success message.
- Close the Window:
- Close the scanning window to return to the previous page.
- View Gift Card Information:
-
After the successful registration of the gift card, the code information will be visible in the App Admin extension block.

-


By following these steps, you can easily scan a QR code to register a gift card. For further assistance, please contact our support team at support@syncu.be.